How to Embed a Stripe Payment Form for Bookings or Services
Learn how to create and embed a Stripe payment form on your website to accept service bookings, consultations, or invoices automatically.
Justwise Accounting
2 min read
🧾 How to Embed a Stripe Payment Form for Bookings or Services
Why Embed a Stripe Payment Form?
If you want to accept payments for services without manually issuing invoices, embedding a Stripe payment form on your site is one of the easiest and cleanest ways to do it.
It’s ideal for:
🔹 Fixed-price consultations
🔹 One-time service packages
🔹 Online bookings where a deposit or full payment is required
Once embedded, customers can pay directly on your site — no external tools, no back-and-forth.
🔸 Step 1: Set Up a Product or Service in Stripe
Start by creating a clear service item:
🔹 Log into your Stripe Dashboard
🔹 Go to Products
🔹 Click + Add product
🔹 Give it a name (e.g. “Initial Consultation – 60 mins”)
🔹 Set the price (e.g. AUD $150)
🔹 Choose One-time payment
💡 You can create multiple versions for different services (30 min, 60 min, premium consult, etc.).
🔸 Step 2: Create a Stripe Checkout Link
Now generate a simple payment page:
🔹 In the same product page, scroll to Payment Links
🔹 Click Create payment link
🔹 Choose the product or service
🔹 Select checkout options (quantity limits, payment method, etc.)
🔹 Click Create Link
You now have a unique, secure Stripe-hosted checkout URL.
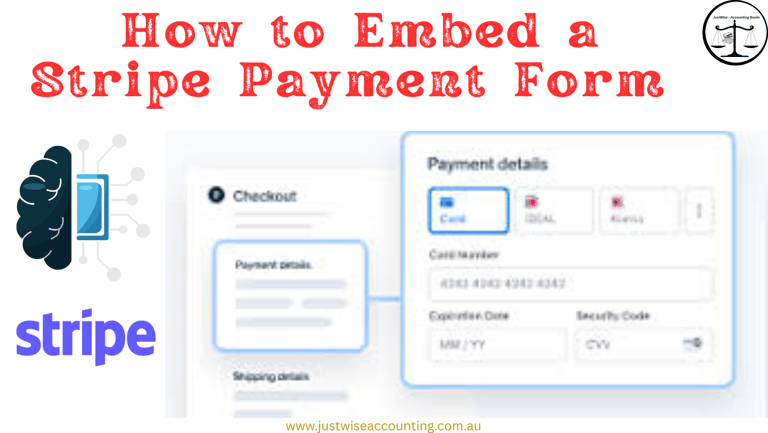
🔸 Step 3: Embed the Payment Form or Button on Your Website
You have two options here:
🔹 Option 1: Embed a Button Linking to Stripe Checkout
Use basic HTML to add a button:
<a href="https://buy.stripe.com/test_1234" target="_blank"> <button style="padding:10px 20px;">Pay for Consultation</button> </a>
🔹 Option 2: Use Stripe's Checkout Embed Widget (Advanced)
If you're comfortable with code, Stripe allows a more seamless inline form via the Stripe API. This requires:
🔹 A server with Node.js or PHP
🔹 Stripe’s API keys
🔹 PCI compliance
Most small businesses just use the hosted checkout link, which is more secure and simpler to manage.
🔸 Step 4: Add Payment Confirmation Messaging
After successful payment, Stripe will redirect to a thank-you page if set. You can:
🔹 Create a simple “Payment Received” page on your site
🔹 Add a message like:
“Thanks for your payment! You’ll receive an email confirmation shortly.”
🔹 Include next steps: booking links, onboarding form, etc.
🔸 Optional: Use in Tandem with Calendly or Contact Forms
If you need clients to pay before booking, this works great in a 2-step flow:
Visitor pays via Stripe checkout
They're redirected to Calendly to book
Or, they fill out a contact form to complete the service request
This keeps things clear and secure while maintaining flexibility.
Benefits of Using Stripe Forms
🔹 Secure payments — fully PCI-compliant
🔹 Cleaner UX — no extra login or invoice approval steps
🔹 Immediate confirmation — automated receipts
🔹 Improved conversions — fewer drop-offs than emailed invoices
Stripe makes it easy to accept payments for any service — even one-off or ad-hoc jobs — with a simple link or button.
Conclusion
Embedding a Stripe payment form saves time and makes your booking or service process frictionless. Whether you’re collecting consultation fees, upfront deposits, or fixed service payments, Stripe gives you the tools to automate it all — without complex coding.
Need help connecting Stripe to your website or service workflow?
Justwise Accounting supports Australian businesses with easy payment automation, setup, and support.
Stay in Touch
© 2025 JustWise Accounting. All rights reserved. ABN 85 581 353 385
⚠️ We respect your privacy. Unsubscribe anytime. (under subscribe button)
Serving Australia-wide
Justwise acknowledge the Traditional Owners of the lands where we operate and pay respect to Elders past and present.